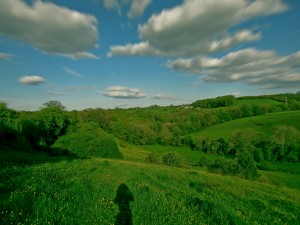
By shooting a landscape with a slow shutterspeed and an ND Grad Filter, you can effectively capture time passing! The blur of water, the blur of the clouds, moving into a single artful, blissful image…
This effect is great, but takes time to carry out, and when you are new to it, takes even more of the same to perfect! So, I have created a tutorial that allows you to create this same effect, all in Photoshop! You can use either version of photoshop, but do note, if you choose Elements, you will need a version where you can add layer masks, such as Elements 10.
Step 1
To begin with, open your start image in Adobe Camera Raw, and apply any edits you deem necessary. Once your image is bright, and beautiful, open it in Photoshop Elements.
Step 2
Once the image is complete, the sky will be the main attraction, so cropping out any distracting foreground elements will have a big impact.
Step 3
Open the image in Elements. Grab the quick selection tool, and ensure New Selection is checked. Select the sky and the clouds, then zoom in and use the Add and Subtract Selection brushes to fine-tune.
Step 4
Edit > Copy then Edit > Paste to copy and paste selection. The selection will now be a new layer. Drag the layer over the create new layer icon to create another copy.
Step 5
Ctrl+Click on the Layer 1 thumbnail to re-activate selection. Go to Select > Inverse to select the foreground.
Step 6
Edit > Copy and Edit > Paste to create Layer 2, a copy of the foreground only. Hide Layer
1 copy (click the eye icon) and select Layer 1.
Step 7
Now comes the real action! Go to Filter > Blur > Radial Blur. Choose zoom as blur method, choose an amount (I chose 10. Dont overdo it, next time you need to double the number!) and set quality to best. Drag the blur centre down to ensure the clouds blur more at the top of the image.
 Now you have your blur!! Of course, you could leave it at this, but it is rather underwhelming. So, to give it more oomph! read on!
Step 8
Click the create new layer mask icon. Select a brush tool choose a soft brush and st opacity to 100%. Spray over the horizon to reveal detail.
Step 9
Reduce layer 1’s opacity to 50% to give a more subtle effect. Select Layer 1 copy and go
to Filter > Blur > Radial blur and set the amount to double the previous amount. I used 10  then 20, this is ideal, because it does not look over the top.
Step 10
Add layer mask, choose brush tool, select soft brush but set opacity to 30%. Set Layer 1 copy’s Opacity to 70%. The horizon may still be a little soft, thanks to the motion blurring. This is where layer 2 comes in. Drag it to the top of the stack, and you have a clean sharp horizon, with motion blurred clouds!
My final image came out quite underwhelmingly, so I will give you a different example instead…


Recent Comments